Prototyping Web Applications in Rails 4
From a presentation I gave at the at the @chchruby meetup on Thursday, 17th Oct, 2013. It was aimed at folks who were unfamiliar with Rails and bear in mind, this was a 15 minute lightning talk. I’ve linked to specific commits below, but you can view the finished repo on GitHub.
Background
Tonight I want share a development style that Rails is very good at, but one that doesn’t get a lot of love in the community.
When I first discovered Ruby on Rails in my days of writing spaghetti PHP, I was amazed with how fast you could write basic web applications. However, as we become better developers and learn how to do things properly, we spend more and more time thinking about testing and decoupling and encapsulation and what to name our variables. In other words: no matter how good your tools are, doing things well is hard and takes time.
So tonight I want to go back to the good old days of not knowing any better, and show you how little effort it takes to throw together a prototype web application using generators and scaffolds and lots of bad hacks.
And although I’d never want to see this kind of code in a production application, I’m increasingly using this technique professionally to develop very fast, cost-effective prototypes for demonstration purposes. After all, it’s much easier discussing the merit of an idea when everyone’s looking at it on the screen, rather than everyone imagining something slightly different in their head.
The Idea
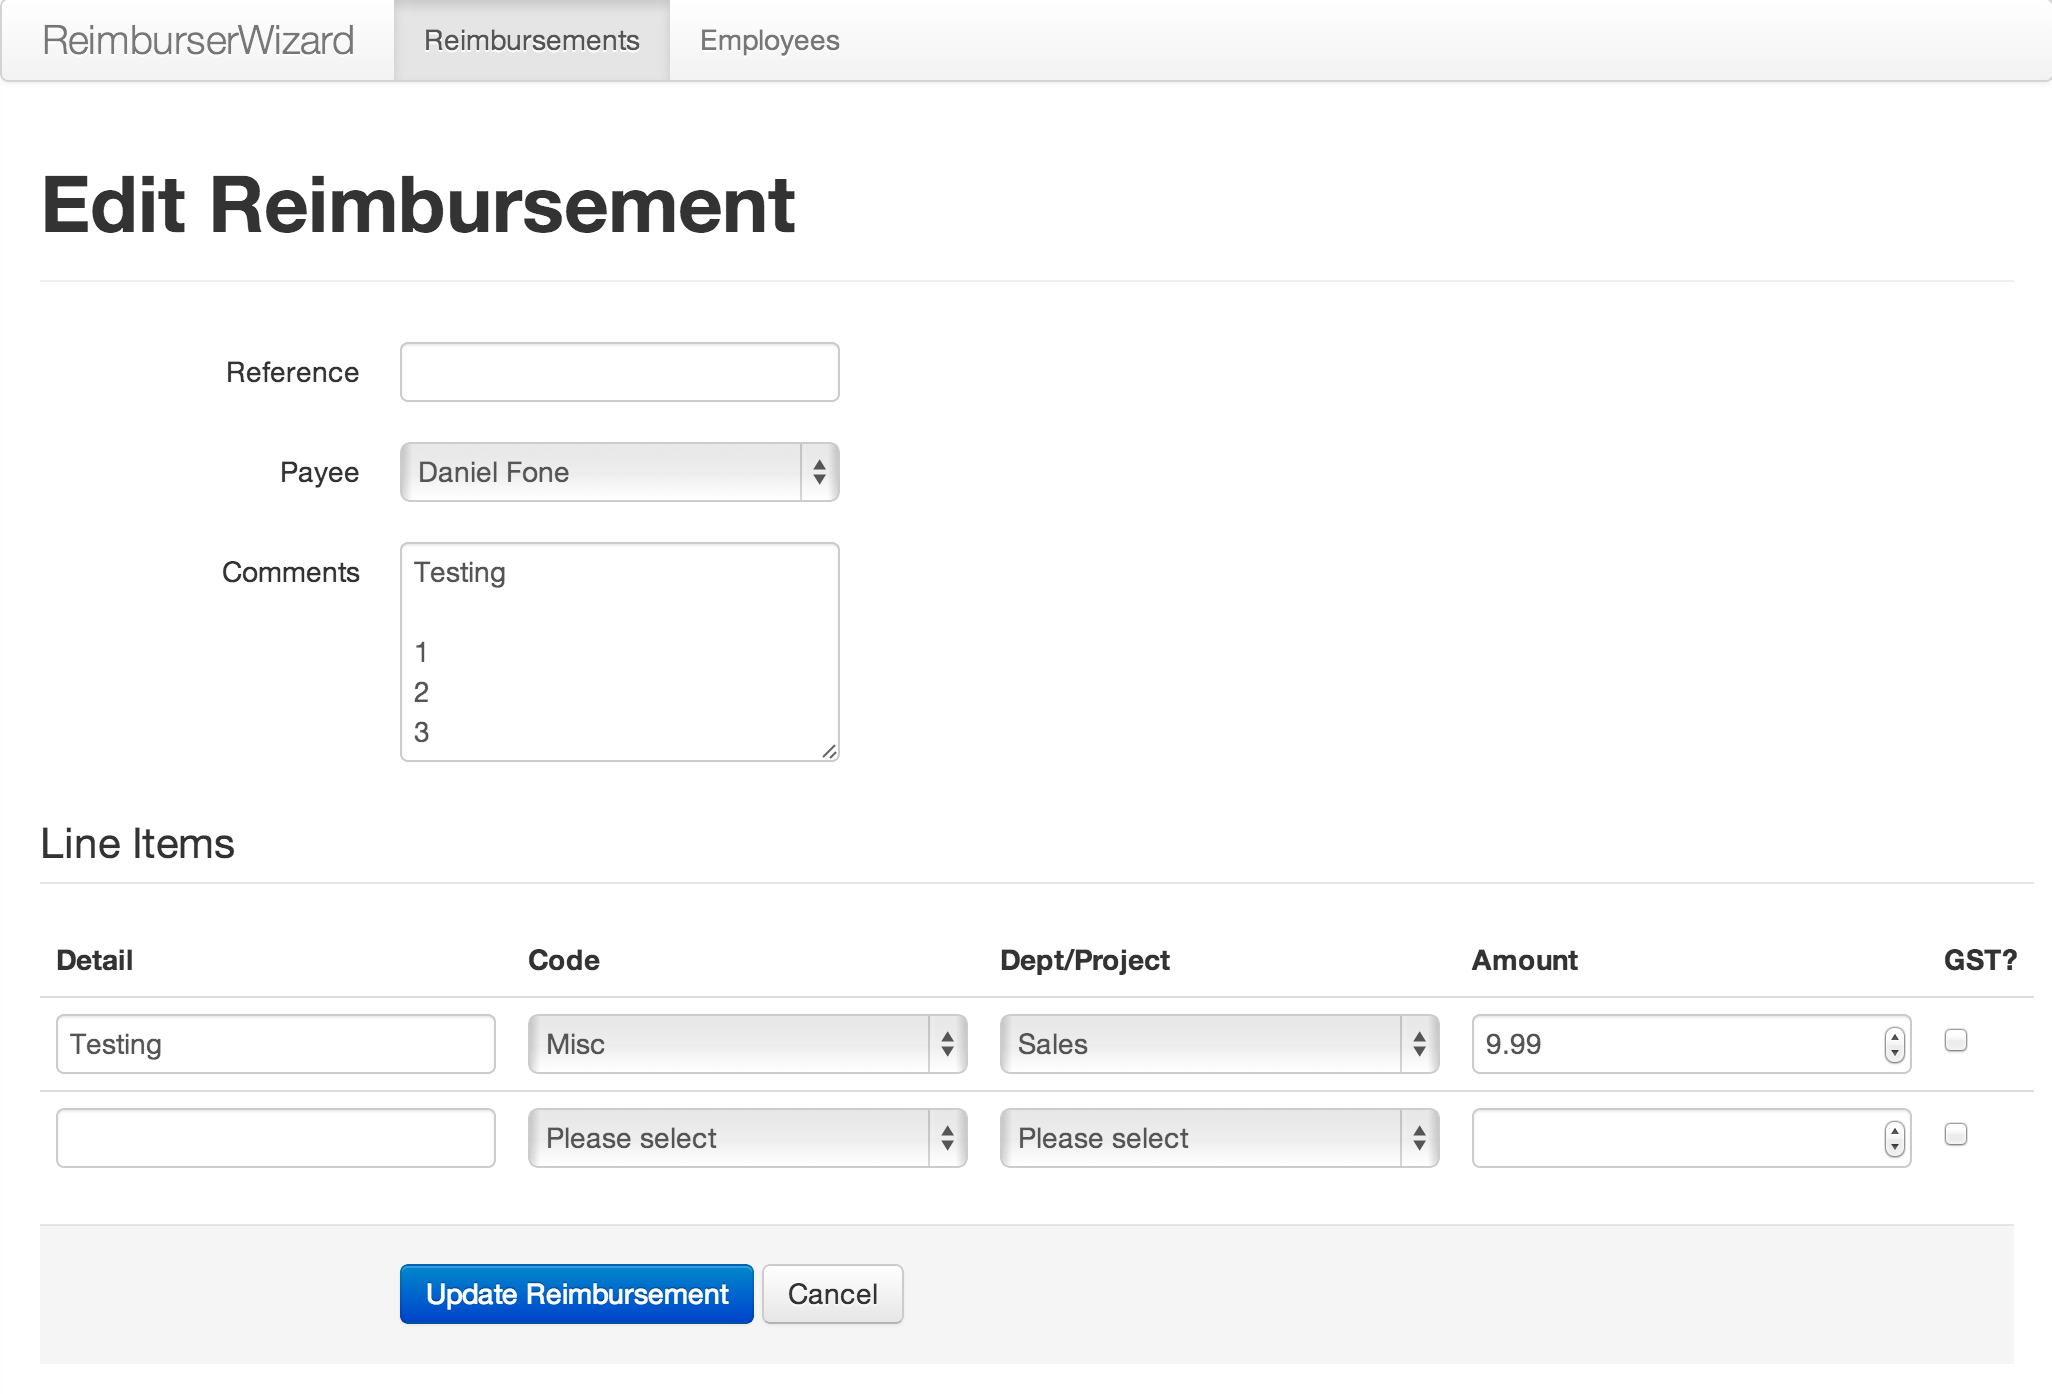
We’re going to prototype a simple reimbursement system. We want to manage expense claims which consist of:
- A simple reference
- A “payee” to reimburse — usually an employee
- A series of lines detailing the expenses, amount, expense codes etc
- Any comments
The Application Skeleton
$ rails new reimburser-wizard -T -m ~/Development/rails-templates/default-prototype.rb
$ cd reimburser-wizard
The rails new command is pretty self-explanatory. It creates a new Rails application in a directory of the same name.
The only two options I’m specifying are:
-T, [--skip-test-unit]         # Skip Test::Unit files
-m, [--template=TEMPLATE]      # Path to some application template (can be a filesystem path or URL)
You can check out my prototyping template on Github, but here’s the basic rundown:
- Disable test generators
- Disable strong parameter protection
- Include the twittter-bootstrap-rails gem and run the generators
- Remove production and test configuration
- Add a partial for rendering error messages
Next we’ll copy in a simple layout (app/views/layouts/application.html.erb) and some bootstrap overrides (app/assets/stylesheets/bootstrap_and_overrides.css).
The Scaffolding
Here’s where we really start building our prototype. Most of the work is done by Rails’ scaffold generators. In this simple prototype, we’ll model our domain with just two resources, a Reimbursement and an Employee.
$ rails generate scaffold Reimbursement reference:string payee:references comments:text data:text
$ rails generate scaffold Employee name:string
$ rake db:migrate
Our Reimbursement model is very simple: we’ve got three regular attributes (reference, payee and comments),
and a data field we’ll use as a meta-attribute for serializing whatever other attributes we need later.
For the purposes of the demo, our Employee simply has a name attribute.
The db:migrate rake task applies the generated migrations to the sqlite database.
As you can see in the commit, the scaffold generators create a lot of code for us.
Now we’ll run some bootstrap helpers to replace the default rails views with bootstrap themed views.
$ rm app/assets/stylesheets/scaffolds.css.scss
$ rails generate bootstrap:themed Reimbursements
$ rails generate bootstrap:themed Employees
That’s it for our scaffolding! The basic foundation of the prototype is in place.
Demo
Now’s an excellent time to play with the application. Let’s start the web server:
$ rails server
Because we haven’t set up our root route, you’ll need to navigate to http://localhost:3000/reimbursements .
We’ve barely written any code but we’ve got a fully functional web application.
Admittedly it’s not very useful yet, but it’s a powerful base to add functionality on to our prototype.
Be sure to create a few Employees for our next step.
Making It Work
From this point, we’ll write code rather than use generators. I’ll link to diffs on GitHub. If you’re new to Ruby on Rails, check out any unfamiliar methods in the Ruby on Rails API docs.
Change payee field to a select box diff
Naturally, we want our users to be able to select employees to reimburse. We’ll use Rails’ collection_select helper for this. Check out the comments on the commit for more info.
Change comment field to be multiline diff
A simple switch from a text_field to a text_area. Confession: after 5 years of professional Rails development, I didn’t know about simple_format until I was preparing this talk.
Add LineItem table to Reimbursement view diff
The line items are the most complex part of this simple app. We’ll start by adding a table on the Reimbursement view to present the line items. Since they don’t exist yet, we’ll “stub” the method on the Reimbursement model to return an empty array.
Add LineItem fields to Reimbursement form diff
To create the line item fields on the reimbursement form, we’ll use the magic of fields_for.
This is a tremendously flexible helper, to the point that I’ve never quite understood how it works
despite using it in almost every application I write.
We’ll also setup our LineItem model, with a few attributes and some validations.
Allow LineItems to be persisted diff
Finally, we’ll inform our Reimbursement model how to persist the line items. We’re going to serialise the attributes as JSON in our data meta-attibute. We need to do a simple transformation on the form data, but the rest is fairly straight forward.
Finished!
In just 15 minutes, we’ve built a very simple prototype that contains some non-trivial functionality.